
Today’s Fancy Fold Video features another easy fold to show off both sides of your designer series paper. You will find in today’s video that there is an added bonus, as I make a mistake. Then I show you how to correct with an embossing buddy and and adhesive remover eraser. Like I always say no mistake in hand stamping just reason to share a trick or embellishment.
This fold idea came from a card I received from Leigh Amburgey. Leigh reminds me of the importance of sending our cards, as she is so good about sending her cards out. When I open my mailbox and she a hand stamped card it always brings a smile no matter what type of day I am having.
You will start out with a piece of card stock that measures 4 1/4″ x 11″. Along the 11″ side you will cut at 7″ and then at 2″. This leaves a piece of card stock that is 1 1/2″ x 4 1/4″. You will use all these cut piece on your card. Next you will need to score your card base from what is left (4 1/4″ x 7″) along the 7″ side at 5 1/2″.
I used the Soft Sea Foam for my card base, I so love the softness of this color. I don’t know why I don’t use it more often. The other sizes of paper are used on this card are as follows:
- 2 pieces 1 3/8″ x 4 1/8″ Pretty Peacock Card Stock
- 2 5/8″ x 4 3/8″ Pretty Peacock Card Stock
- 4 1/8″ x 5 3/8″ Pretty Peacock Card Stock
- 2 pieces 1 1/4″ x 4″ Frames & Flowers Specialty Designer Series Paper
- 4″ x 5 1/4″ Frames & Flowers Specialty Designer Series Paper
- 2 3/8″ x 4 1/8″ Basic white Card Stock
This fun fold really allows you to show off your Designer Series Paper and with the double layering of card stock it highlights the colors in the paper so well. Now sit back and watch how easy it goes together and watch the Whoops I make and how I correct it.
Product List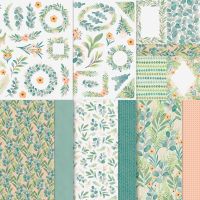



Leave a Reply